Backlash Rescue · 2026
How to Fix Baitcaster Backlash: Remove It Without Ruining Your Line
Every baitcaster angler, beginner to pro, deals with backlash. The bird’s nest happens when the spool spins faster than the lure pulls line away, and the fix is almost always patience, not force: thumb pressure, controlled pulls, and working the tangle out loop by loop. This guide shows how to fix baitcaster backlash step by step, when cutting line is actually smart, and how to prevent the next one.
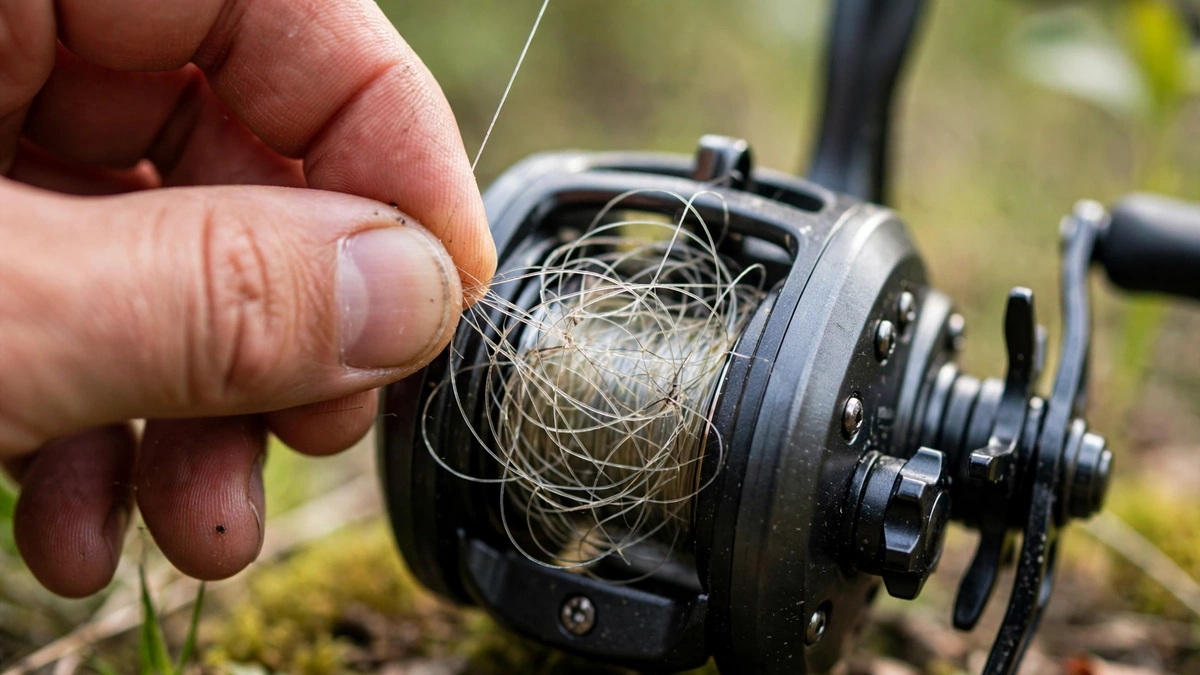
Why a baitcaster backlashes
A backlash is a timing failure: the spool keeps feeding line after the lure has slowed or stopped, and the loose line piles into loops that lock together. The contributors are always some mix of the same suspects; too little brake for the lure weight, loose spool tension, a hard jerky cast, wind pushing against the lure, a very light lure on a heavy spool, or late thumb timing. Understanding which one caused this backlash is what turns a frustrating stop into a useful lesson; our how to adjust your baitcasting reel guide diagnoses backlashes by where they start in the cast. And here is the truth every article should tell you: no reel is 100% backlash-proof, not even digital/DC systems. The goal is fewer, smaller, faster-cleared tangles, not zero.
The quick method: thumb pressure, then controlled pull
Do this first for every backlash. It clears the large majority without tools or cutting.
Step 1: Stop pulling as soon as the line catches
The moment you feel the backlash, stop reeling and stop pulling line. Every yank tightens the loops and welds the tangle. Put the rod down somewhere stable, take a breath, and look at the nest before touching it.
Step 2: Press your thumb firmly onto the spool
With the clutch still engaged, press your thumb hard onto the tangled line on the spool. This locks the mess in place so your picking works on the tangle instead of feeding more loose line into it.
Step 3: Disengage the spool and pull line gently
Now disengage the clutch (thumb bar) and pull the line gently from the rod tip side. Pull until you feel it catch, that catch is the loop causing the jam. Do not force past it. Instead, pick at that loop with a fingernail or a blunt tool (a toothpick works), lifting it up and out of the nest.
Step 4: Work outside-in, then rewind under tension
Always work from the outermost loops inward, the last loops laid down are the first causing trouble. Free one loop, pull a little line, find the next catch, repeat. Once line pulls freely, re-engage and wind it back onto the spool under firm thumb tension so no loose wraps remain to cause the next backlash.
Compact line cutters make clean trims safer and easier when a backlash truly will not pick out, or when trimming damaged line after a bad tangle. A clean cut beats a frayed, weakened section every time.
How to clear a stubborn backlash
For deep nests, usually in braid, which locks brutally, escalate patiently. First, pull line off the spool well past the tangle to isolate it, giving yourself working room. Second, find the “key loop”: the single loop that, when lifted, releases a whole section. It is almost always near where the tangle feels tightest. Third, use two hands: thumb pressure on the spool with one hand, picking with the other, so freed line cannot re-tangle. Fourth, if loops are buried under tight wraps, carefully unwind line from the spool by hand until you reach the tangle’s depth, then work it as above. Time invested here saves line and money, most “hopeless” backlashes yield to ten patient minutes.
When cutting line is the right choice
Cutting is not failure; it is triage. Cut when loops are welded so tight that picking risks damaging the remaining line, when you have spent 10+ minutes with no progress, or when the tangle sits deep enough that removing it costs more line than cutting past it. Cut above the damage, strip back to clean wraps, and retie, then inspect the remaining line for nicks before fishing on. Braid tangles deep enough to cut are also a signal: your braid was probably wound on too loosely (see how to spool a baitcasting reel), which is worth fixing so the next one does not weld the same way.
Reset the reel before the next cast
A cleared backlash is a symptom, now treat the cause. Ask what changed: new lure (re-run tension and brakes), wind picked up (add brake), casting harder for distance (smooth out), thumb late at the landing (feather earlier). Make one adjustment, then verify with short test casts before fishing at full effort. Skipping this step is how one backlash becomes five. The full tuning sequence is in how to adjust your baitcasting reel, and the pre-fishing verification in when a baitcaster is good to go for fishing.
How to prevent future baitcaster backlashes
Prevention is a checklist, not a talent. Learn with one manageable lure, a 3/8 oz jig or practice plug, instead of rotating through weights that each need different settings. Set brakes conservatively and reduce them only after clean casts; magnetic and digital brakes are the most forgiving while learning. Run the tension drop test with every lure change. Cast smooth, not hard, sidearm, letting the rod load. Keep thumb contact through the whole flight and stop the spool before the lure lands. Spool correctly, 1/8 inch below the rim, wound under even tension. Learn on monofilament (12–17 lb); its backlashes pick out easiest and its stretch forgives timing errors. Stack these habits and backlashes become rare, small and fast to clear.
A hook-free practice plug lets you rehearse smooth casting and thumb timing in a yard, building the muscle memory that prevents backlashes before a fish is on the line.
Backlash troubleshooting by where it starts
At the launch: spool tension too loose, tighten and re-run the drop test. Mid-flight: not enough brake for the lure or wind, add brake one click at a time. At the landing: thumb timing, feather earlier and stop the spool before the lure hits. Only after switching lures: settings belong to the old lure, full re-tune. Random and worsening through the day: suspect loose line lay or line damage, strip and rewind, or re-spool. Diagnose first, adjust second, and change only one control at a time.
Read next
Backlash-proof your fishing: how to adjust your baitcasting reel, baitcaster tips for beginners, baitcasting reel parts explained, and how to spool a baitcasting reel.
Frequently asked questions
Can you remove a baitcaster backlash without cutting line?
Yes, most backlashes clear without cutting. Thumb the spool, disengage the clutch, pull gently until line catches, and pick loops out from the outside inward. Only cut when loops are welded tight after patient picking, or when the tangle is deeper than the line it would cost to remove.
Why does a baitcaster backlash?
It backlashes when the spool spins faster than the lure pulls line away. Causes include too little brake, loose spool tension, hard jerky casts, wind, very light lures, late thumb timing, or loose/overfilled line on the spool.
How do I stop a backlash at the end of a cast?
End-of-cast backlash is thumb timing: keep your thumb close to the spool in flight and apply firm pressure before the lure lands, not after. Slightly more brake helps while the timing becomes automatic.
Should I cut out a baitcaster backlash?
Only as triage, when loops are welded tight, 10+ minutes of patient picking has failed, or the tangle is deeper than the line it would cost. Cut above the damage, strip to clean wraps, retie, and inspect the remaining line.
Does braid make backlashes worse?
Braid’s backlashes are harder to pick out because the thin, zero-stretch line locks tightly, but braid does not cause more backlashes by itself. Loose winding is the usual culprit; wind braid on under firm tension with proper braid backing and it behaves.
Is there a baitcasting reel that never backlashes?
No, every reel can backlash, including digital/DC models, because thumb timing and conditions always matter. What premium brakes buy you is a much wider margin of error, not immunity. Technique still decides.
© baitcastingreelz.com · Affiliate disclosure: As an Amazon Associate, baitcastingreelz.com earns from qualifying purchases. Optional supply links are provided for convenience and do not change the instructional guidance. Product availability and specifications may change.